This time I assembled an example that shows how to create a kind of funky sunbeam-effect using the MetaSL shaders. I won't go too much into the details this time. I tried to make the project quite self-explaining. Just start at the top of the workspace where you can see some nodes connected. This is the basic idea of how the ray pattern is created. Further down in the workspace you can find several Phenomena that extend the ray pattern effect. Later I will show you how you can achieve the same effect much easier using the MetaSL curve shaders.
You can find the mental mill project here.
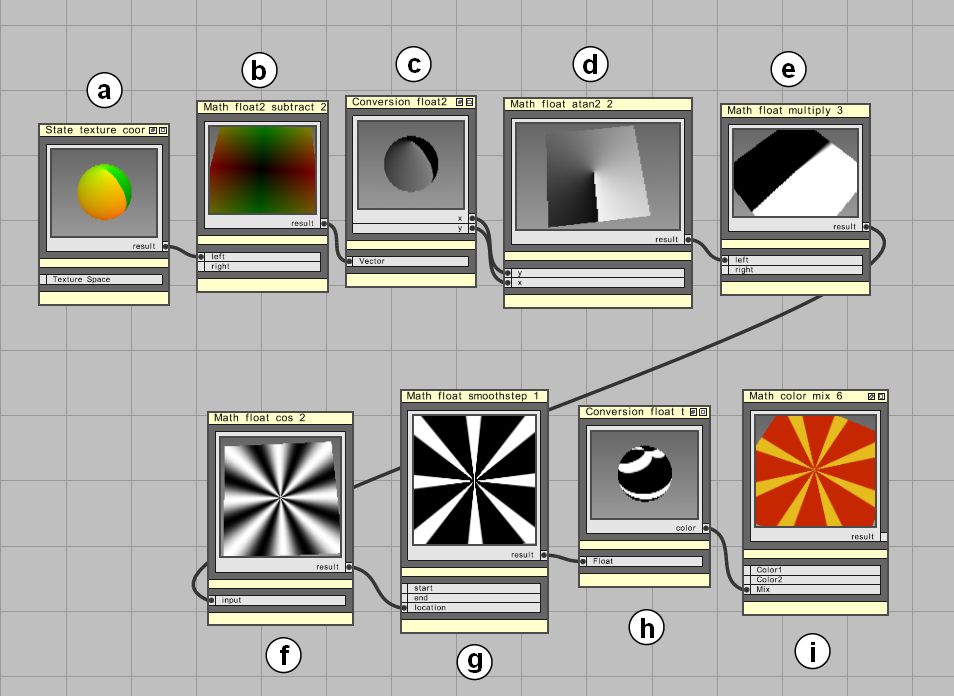
The texture space is offset so that it ranges from -0.5 to +0.5 (a and b). The u and v components are split (c) and then fed into a Math_float_atan2 (d) node. This returns values that range from -PI to +PI. By multiplying this with an integer (e) (well actually it is a float, i guess you know what I mean) and feeding it into a Math_float_cos node (f) you get a result that ranges from -1 to +1 and creates the ray pattern.
To shape the rays I used a Math_float_smoothstep (g) node. The result of the cosine-node is fed into the 'locaction' input of the Math_float_smoothstep node. For the input parameters 'start' and 'end' use values that are close to each other to get a crisper transition. Applicable ranges are between -1 and +1.
Finally the resulting float value is converted to a color (h) and fed into the mix parameter of a Math_color_mix node (i) that you can use to mix two different colors.
Next I will show you how to use the MetaSL curve shaders to achieve the same effect but faster and in a more versatile way.
No comments:
Post a Comment