Friday, December 31, 2010

Blurred environment reflection

Here is a shader that is intended for real time usage. It takes advantage of passing custom derivatives to the texture lookup function. This is quite useful to produce blurred environment lookups. This enables you to produce more realistic looking surfaces because it allows you to mimic real-world surfaces in a much better way.

Since it is the 31st of December and I am about to dive into the next new year's party I will keep this post short... ;)

Idea:
Create an shader for real time usage that blurs the reflection based on the incident viewing direction.

Different Blurs of the reflection:
  • From inner to outer 
  • from outer to inner 
  • controlled by another texture

Observation:

  • If you take a look at a blurry surface, the reflection gets crisper when you look at it from a grazing angle. I observated this in detail a couple of years ago when I was working at a post production company and we were doing a promotion video for a big steel industry company.
    My colleagues back then told me that I was too meticulous. Maybe I was, but when your passion is building shader graphs its the observation and implementation of these small details that give the extra punch to your shader.
  • Also, reflections appear to have less saturation which, depending on the surface is not true. However, I added a control to the shader that allows you to drive the saturation of the lookup.


Other features:

  • The environment blur can be inverted
  • A constant blur can be applied too
  • Amount of the incident blur can be controlled

Tip:

  • Use the constant blur to shift the incident blur
Find the shader code on the mental images forum

Increasing the intensity of the constant blur (controlled by a texture) can yield
stunning looking corrosion effects. Also the reflection saturation has been
reduced for these screenshots.

Happy New Year Everyone!

Thursday, December 30, 2010

Uncharted 2 Art Direction

As shader artist, you have to work closely with other designers, modelers, art directors all of which have a different view of their profession. When it comes to creating big game titles, I am in awe how good these groups can work together to produce these marvelous wonderlands that take us to new places that don't even exist in the real world.
A friend of mine forwarded me this link that gives insight in the art direction of the game "Uncharted 2". Though I haven't played the game, the document is very interesting and can give you some insight and good inspiration. Take a look.

Art Direction in Uncharted 2

Tuesday, December 14, 2010

The beauty of aliasing

It does not happen too often, but occasionally there is beauty in things that you don't want. What I am talking about is aliasing. I guess that lies in the nature of those who like playing around with visuals. I have to admit that I am one of those persons who get inspiration from things that go 'wrong', but especially in visual arts there is sometimes no real wrong or right. Some people might say 'oh, that looks great' while others will comment that this is the most useless thing that they have seen.
Visuals are a bit like music, taste is also so different. So while I have been testing the shader pack that will be released today or tomorrow on the mental mill forum, I started cranking up some parameters. All of a sudden,  aliasing patterns appeared and that looked quite beautiful actually.
The beauty of aliasing

And talking about visual arts. My very first blog entry featured a fractal shader. I discovered this amazing 10 minute fractal zoom that features some tech-house sound. It might not be everybody's taste. Beauty is in the eye of the beholder.

Fractal Zoom (HD) to 6.066 e228 (2^760) Mandelbrot - (Last Lights On)
http://www.youtube.com/watch?v=foxD6ZQlnlU

Quote from the video description:

For the record, 1 to 6e228 is like expanding a proton to 7000000000000000000000000000000000000000­0000000000000000000000000000000000000000­0000000000000000000000000000000000000000­0000000000000000000000000000000000000000­000000000000000000000000000 times the size of the visible universe. [...]
(Proton has 1 femtometer diameter, universe has 93 billion light year diameter)
If you were actually traveling into the fractal, you would be moving faster than the speed of light.

Friday, December 10, 2010

Web 2.0 shader

The idea
Seeing all those fashionable buttons and icons on every web page, smart phone etc. I though it was about time to create a shader that can just do this for us: Generate shiny icons. So here is the result:

This is probably one of the most pointless shaders that I have made so far ;) Nevertheless it was great fun to work on. If you have read my previous blog entries you will see that this shader reuses the ideas presented in these blog entries. It is a mixture between rendering a square and circles.

Features:
The shader outputs the color map of the icon, a bump map and a black/white mask for the icon.
A large number of input parameters give you control over the shader: Roundness of the icon, position, size, highlight intensity and highlight color, bump map intensity, just to mention a few. Just play around with it and see for yourself.


The MetaSL code
If you can call yourself a mental mill owner, I recommend to step with the visual debugger though the source code and see what it happening in each step. I tried to make the code as clear as possible and it is full of comments. Nevertheless sometimes looking at the debugger and 'seeing' is far much easier than reading comments and source code.

Here are some variations of the shader. I plugged the bump map into an Illumination_phong node to obtain some crisp highlights that I added on top.

You can download the shader along with the test-icon and a mental mill project from the mental images forum:
Web 2.0 Shader Source
Feel free to modify the shader for your own needs and let me know your feedback or any questions.

Further improvements
As almost everything in life, this shader can be improved by adding a few more features to it. I will leave it as it is right now. Experienced users might want to implement the ideas mentioned below:

  • Make a softer transition for the bump map. The edges are quite hard which leads to aliasing artifacts. It would be better to ramp the normal gently.  
  • The highlight overlay could be tweaked to look nicer. Right now a simple blend between the icon color and the highlight color is performed. Trying some other blend modes might yield a more realistic looking reflection overlay.

Thursday, November 25, 2010

Displaying functions in a MetaSL shader

In the previous blog entries I talked about the procedural generation of lines, squares and spheres. Next I want to talk about the possibility to visualize 1 dimensional functions in your shader as a plotted graph. Depending on your expertise you might never ever want to do that. I remember that I always wondered at school what function graphs are useful for. It wasn't until I started 3D rendering, animation and shader writing that I saw a need for creating my own functions or try to understand what a certain function looks like. Now that has changed and I check regularly the look and shape of my functions.
I will not discuss WHY you would want to do this. You will find out at the moment when you need it. Just make sure to remember this blog entry. 

Displaying a function graph on a plane

Sometimes it can be really useful to try to understand a function and what it does in a graphical way. I will present a simple framework for displaying your graph inside a shader.

Using texture coordinates as our coordinate system
First we will start by displaying a typical function graph on a plane. As in the previous blogs I will be using texture_space[0] as my coordinate system. In mental mill, if you switch to the plane preview geometry object texture space 0 aligns perfectly with the quad. This means, it covers the UV coordinates which range from 0 to 1 linearly.


Changing the range of the coordinate system
Now that we have a suitable coordinate system at hand, we take a closer look: The UV coordinates range from 0 to 1 which might be fine in some cases, however, before we start plotting a function, we should add a function that allows us to change the range of our coordinate system. I will call the function change_range. It maps the interval that lies between old_min and old_max so that the interval will be remapped to lie between new_min and new_max.

Example: If old_min and old_max are 0 and 1 and new_min and new_max is 10 and 20 a value that was 0.5 in the 'old' range will be mapped to 15 in the new range.

Here is the MetaSL code for the function:

// changes the range of a given coordinate system.
// Values that varied between 'old_min' and 'old_max' 
// will be mapped so that they vary between 
// 'new_min' and 'new_max'
float change_range(float old_min, 
          float old_max,
          float new_min,
          float new_max,
          float x)
{
    return ((x-old_min)/(old_max - old_min))*(new_max - new_min) + new_min;
}


If we pass the UV coordinates and choose 0 and 1 for OldMin and Oldmax we can choose any arbitrary values for NewMin and NewMax. See the following image where the coordinate space is remapped using the function mentioned above: 

You can see that the shader debugger clearly shows the new
range of the texture coordinates.
Outputting a function graph
Now that we have met all our prerequisites, we can start thinking about plotting our function graph. For each value on the x-axis we compute a value on the y-axis that we will output.
So this task is now straight-forward: We write whatever function we want to calculate and feed the x-coordinate (of our remapped texture space) as our function argument. For example if we just take a square function it would look like this:

float x_square(float x)
{
  return x*x;
}

We will pass the x-coordinate to our function so that it will be processed by the function to obtain the new value. Now that we have computed the new value, how can we output a graph? In older blog posts I mentioned that inside a shader we can not ask to draw lines or polygons, because a shader is executed for a given pixel when lines and polygons are already being rasterized. So instead of asking "draw here" or "draw there" we ask: "Where are we and what information we have currently available?" and based in this information we can decide in which color we want to output that pixel/fragment that is being rasterized.
So we know the current coordinates and we have also calculated the new value. How can we put that into a graph? As you know, we want to show the resulting value in the y-axis of the coordinate system. As we can not explicitely ask to draw a point at a certain position, instead we test if the value that our function returned is greater or smaller than the value of the y-coordinate of our coordinate system.
If it is smaller, we assign the 'lower' color, otherwise the 'upper' color.
Displaying the function y = x*x using the remapped texture coordinates
as our coordinate system
Of course you can add more functionality to your shader by adding input parameters that allow you to change other parameters of your function: In the image below, the power function is used and the user may provide different values for the pow-function.

Check out the code sample here, feel free to extend and reuse it for your own projects!


Related links:
RGBA's past and future intros This video is a seminar that was held during Breakpoint '07. In this video clip, IQ talks about how he and his demo group are creating their demos. It has a strong realtime aspect and I recommend watching this video especially to those users who are interested in realtime shaders and those who like the demo scene in general. 
Check out the section at minute 14. Here you can see how function can be (ab)used to generate procedural textures. Very inspiring! (Note: Don't be confused: The file info says that the file  1kb only, but this will be the full video file!)

Monday, November 15, 2010

Rendering lines and squares

How to render lines in a MetaSL shader
If you haven't read the previous post, I recommend to do so as well. However, I will repeat some things: In a shader you can't ask the graphics engine to draw lines or triangles to the screen because the shader is executed already during that process.
Instead it has access to a variety of data that is passed to the shader. This data includes texture coordinates, normals, position in space and so on.
When rendering a pixel we need to determine whether we shall color the pixel because it is close to a line or whether we want to output the background color. So much for the theory. The simplest thing that we can do is to draw a straight line, let's say along the x-axis:

We can determine how far the pixel is away from it and apply a smoothstep function to generate a clamped transition value that fades from 0 to 1 within that range. This allows us to set the line width using a shader parameter:

I will let you figure out how that shader would look, it's really trivial. So next I want to extend the line drawing so that I am able to draw lines in any arbitrary angle. To define a line, we need 2 points, pt_a and pt_b.
There are plenty of explanations for calculating the distance between a point and a line, check out this link on Wolfram Mathworld, for example.

Using the function that calculates the distance of a point to the line, we can now draw lines with arbitrary slopes:
Check out the source code for the shader here

Rendering a wire/solid square in a MetaSL shader
Since we already covered how to calculate the distance from a line/circle, we are finally missing the squares and rectangles. Without further ado, the formula for the distance of a point from a rectangle is:

distance = max(abs(rect_center.x - coord.x) - rect_size.x,
           abs(rect_center.y - coord.y) - rect_size.y);


float2 rect_center - The center position of the rectangle
float2 coord - The coordinate to test against
float2 rect_size - The size of the rectangle

The debugger in mental mill allows you to take a look at the result of the distance function.
You can activate the debugger by holding down the "Ctrl" key and dragging with your mouse
in one of the debug variable viewports.


Drawing shapes in mental mill

This post should have been originally part of a much much longer entry, but it turned out to be way too elaborate, so I will start very small. The post today is all about drawing simple geometric shapes in mental mill, using the texture space as a coordinate sytem.

"So why would I ever want to do that!?" you may ask next. This is a good and valid question. It will become more obvious when I have one of my next blog entries ready that implements a simple 2 dimensional ray marcher in a shader. For now, just assume that you would like to render simple geometric shapes such as spheres and squares.

Rendering procedural 2D shapes in a shader
In a shader you can't just say "Draw a line from A to B" - this is because a shader is executed when the triangles and lines are being rasterized, so a shader can not issue drawing calls. But the shader has access to certain information that is passed along like texture coordinates, surface normal etc.
If we want a shader to draw procedural shapes, we need to change the process of generating procedural shapes. Instead of asking our program to draw something (which we can not do) we ask it instead: Is the (current) pixel that we are about to display near the line? If yes, it will receive the line color, otherwise we will use some background color.


Here we will use the texture coordinates as our coordinate system. This is also perfect to inspect in mental mill on the 'plane' geometry. Check out the shader code here.


This shader provides some control over the size and the position of the circle.

Rendering an outlined circle
However, we can change our shader to render a circle with a line. We do this by testing how far the current point is away from the boundary of the circle. If it is within a given range, we apply a smoothstep function which outputs a value from 0 to 1 when the length varies betwen 0 and "line_width".


The result of the shader can be seen here:

This is just the beginning. In the next post I will show how to render lines and squares, so stay tuned for more! Feel free to ask questions if you need more explanations. Shade safe and have a nice day! :)

Wednesday, November 10, 2010

Get inpired, check out the KoddeShader v2.0

These days one of our mental mill power users released his latest version of a versatile and powerful shader, the KoddeShader on the mental mill. This is already release 2.0 of Kogi's shader, so there are a couple of new features that you can check out.
It is always great to see how users create shaders using mental mill, export them and release their work to the public. I hope to see more great work coming! Also don't forget to check out the .pdf documentation, as it is written really carefully, containing lots and lots of illustrations.

Wednesday, November 3, 2010

Things you should never do

Today I read an interesting article about the consequences of writing software over and over again. While this can have a major impact in big companies, this also affects programmers who work on their own private project. Trying to start from scratch is something that happens to all of us who are writing code, no matter if it is an entire program or a shader. But you will learn those details in the article, so check it out.
I hope you feel as inspired as I did and remember: Good code never gets rusty, no matter how old it is!

Tuesday, October 26, 2010

texture lookups in mental mill

One thing that confused me in the early beginning when I started writing shaders was this: Sometimes texture lookups that caused artifacts that looked somewhat like aliasing when previewing them in the realtime preview. Later I learned why and how that happens and how to avoid it. So I will present the problem and its solution:

Cutting texture coordinates

Whenever you 'cut' texture coordinates, this creates discontinuities. In this example I take a fraction of the texture and loop it over across my preview geometry. This is accomplished by using an fmod() operation. After performing the texture lookup and previewing the shader, you can see some jaggy artifacts that are especially noticeable and disturbing when moving the geometry. In the magnified region you see that between
the tiles some dark pixels show up.

Wrong Mip Map lookups

So what is going on here? You might have guessed already that the fmod() operation did something bad to our coordinates. Well, one could say so, but the operation itself is innocent. The reason for this behavior is that during rasterization the GPU tries to determine the MipMap level automatically by comparing the texture current coordinates with the values of the adjacent fragment or pixel. As long as the coordinates are continuous it can correctly determine the right MipMap level.
But when the coordinates were 'sliced', this created discontinuities. When such a discontinuity is reached, the difference between two neighboring pixels or fragments is so big, that the GPU chooses a very small MapMap which causes the artifacts in the realtime preview.

Fixing incorrect lookups by using custom derivatives

How can we remedy this situation? We need the texture lookup to choose the appropriate MipMap level, even though there is a discontinuity. That is why there is an overloaded version of the tex2D texture lookup in mental mill (which also exists in the Cg language, by the way).

tex2D(texture2D texture, float2 coordinates, float2 coord_dx, float2 coord_dy)

The second two arguments are the derivatives to use. First we need to know: What are derivatives? The derivatives indicate the changes from one pixel or fragment to the next. If the user performs a texture lookup without providing custom derivatives, the derivatives of the texture coordinates are automatically calculated and used.

We just saw that this operation failed. We also know why, so let's calculate our own derivatives and pass them to the texture lookup function above.

How to determine the correct derivatives

First we need to learn about the functions that calculate derivatives for us. These are:

ddx() and ddy()

These are overloaded functions which take a float, float2, float3, float4 or Color. The functions return a variable of the same type which contains the derivative. The derivative returns the difference of a variable between two fragments. ddx() calculates the difference in the x-direction while ddy() calculates the difference in the y-direction.

The derivatives that we really want to use are the derivatives of the original texture coordinates before we sliced them up. Why is that?
We didn't change the scaling of the sliced texture coordinates. We just set a different tiling. This means that we can use the derivatives of the original texture coordinates for the texture lookup.

So we can write:

float2 x_deriv = ddx(texture_coordinate[0].xy);
float2 y_deriv = ddy(texture_coordinate[0].xy);
result = tex2D(tex, coord, x_deriv, y_deriv);

Now, lets see how that affects the shader:
As you can see now, the aliasing artifacts are gone.

So whenever you see such artifacts, check if you are causing discontinuities in your texture coordinates. These are created by using the fmod operation for example, but if-else clauses that assemble texture coordinates based on a condition can cause this.
If that is the case, try to resolve these issues by using the overloaded texture lookup that uses derivatives. This is especially relevant if you intend to use your mental mill shader in a realtime application.

I hope next time you run into this problem you will remember this post and quickly resolve these issues.


Wednesday, October 20, 2010

Mandelbrot revisitted

Recently I was updating one of the first shaders that I created with mental mill called fractal. What I love about fractals are, that a simple algorithm yields such impressive shapes with sheer endless details. Obviously I was intrigued and was inspired to write a shader that made use of them.

One thing that I like about working with mental mill is, that you can make any parameter tweakable. So if you have a formula that uses three variables, they don't necessarily have to be constants. Instead you can edit them through the mental mill GUI. Sometimes you can yield surprising results by making variables tweakable that are 'not supposed' to be tweaked.

That happened to me when I recently revisited the MetaSL code for my fractal shader. I was looking at the abort conditions in the fractal loop. There are two conditions:
  1. If the squared distance of the original point exceeds 4.0, then the point is not part of the set and is discarded.
  2. If the iteration exceeds the maximum number of iterations the process stops. At this point it is not certain whether the point will diverge or not, however it is regarded to be part of the set.
There is not much one can change about the second condition (and the number of iterations is already a shader parameter anyway). Making this a parameter made the abort condition tweakable with some astounding results. If you lower the value, you can see how the rendering morphs into a cartoony look.

This is quite surprising and beautiful to see. If you adjust the values carefully you can get some really great pictures. If you want to use the shader in mental mill, you can find it here. TThe shader parameters are straightforward. You can switch between the Mandelbrot and the Julia fractal. However, if you want to view the Mandelbrot fractal in its original shape, you must set the shader input parameters start_real and start_imaginary to 0.
Here are some other presets that I created using that shader:

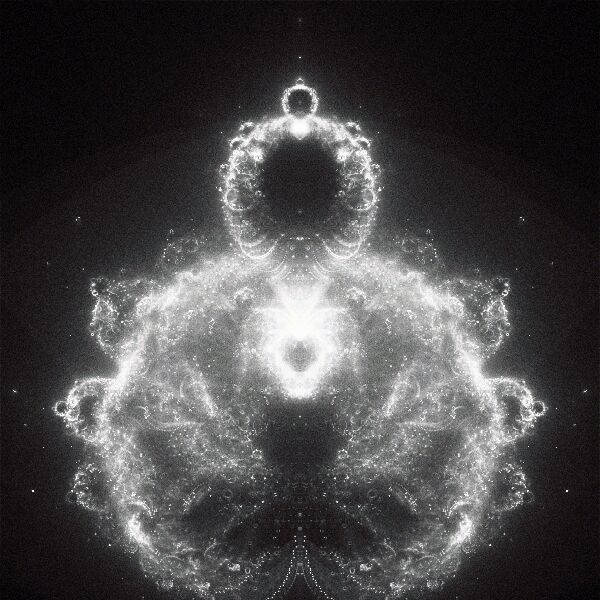
That's it for now. By the way, there is a lesser known variation of the Mandelbrot fractal: The Buddhabrot which unveils even more fascinating shapes. Check out Melinda Green's page!


Introduction to the mental mill blog

Welcome to the mental mill blog!

This blog is all about mental mill®, the shader workbench for programmers and artists. So what kind of information can you expect here? On this blog you can read a lot of random information about mental mill, MetaSL and 3D computer graphics. The information will be quite versatile. I plan to post shader snippets and complete shaders for mental mill. I will also include Tips and Tricks and best practices when using the mental mill application and the typical do's and dont's.
In some cases I will show workarounds and other non-official tricks, that may be interesting for those of you who like to get your hands dirty.

Since I have an artist background and I like shader writing, this will be the place where both worlds meet for new ideas to inspire your own projects. Also if I come across extraordinary work from other users, which has been published, I will link you to it.

That's all for now, I am looking forward to writing some interesting stuff here, so check out what's coming up! Shade safe and have a nice day :D