Motivation
In the previous post I explained how you can create a ray pattern effect using basis mental mill nodes. This involved some math operations and it took a couple of nodes to make the effect work. We want to achieve the
same result in a simpler way, so next I show you how to use the curve nodes that come with mental mill curve shader pack.
This pack includes nodes that generate one dimensional curves which can be used to drive shader parameters, remap values and colors and generate textures and patterns.When you use those curve nodes for the first time you might get the feeling that this whole concept is a bit abstract, so I would like to give you an idea of how versatile these shaders really are and I will show one use case.
 Curve Shapes
Curve shaders are able to generate curves of all kinds of shapes. Basically they implement a mathematical functions of the style y=f(x) which means that for a given input value X an output value Y is computed. The curve shader nodes were designed that you are able to see the curves graphically by opening the "graph_out" parameter of a curve node.
Curves can be used to generate patterns using the "gradient_linear" and "gradient_radial" nodes.
 |
| Here you can see which kinds of curves you can generate |
 |
| Angular and radial gradient - the boolean switch allows to change the generation behavior |
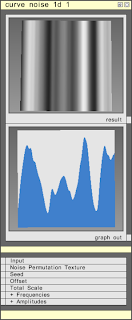
Try different curves and you see how the generated texture changes. If you want to create a fancy ray pattern, use the noise_1d curve which gives you a large number of animatable parameters to generate random looking rays.
Now you know how to generate basic patterns. It gets more interesting when you start sidechaining other gradient nodes which I will show in the next steps:
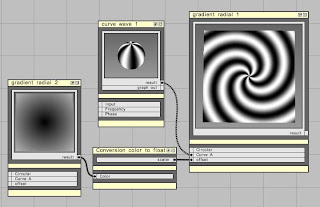
The gradient_radial node has an input parameter 'offset'. Create another gradient_radial node, convert it to a float value and attach it to the 'offset' parameter of the first gradient_radial node: You see that it generates a spiral now.

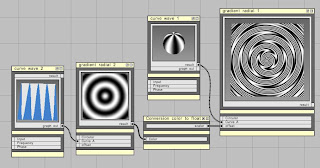
I guess now you know where we will be going with this example: The offset is now driven by another gradient node. So what happens if we attach another curve generator to the second gradient node? Let's try that:


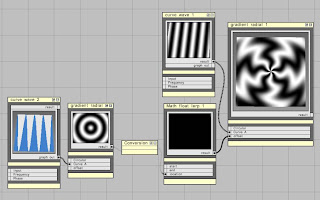
Now the offset gives some really interesting result which we can further elaborate on by animating it. So lets add some animation on top:
Create a state_animation_time and send it to a math_float_multiply so that you can adjust the speed of the animation. Connect the result to the offset parameter of the second generator node.
Start the animation now and see, how the ray pattern is animated now.
From there you get the idea how you can create arbitrarily complex patterns by combining several gradients that drive other gradients.
Conclusion:
In case you need to create fancy ray patterns for some retro-70ies effect, you now know what you need. Though I'd expect you won't need to create this kind of procedural patterns too often, you get an idea of how you can use curve nodes to create different kinds of gradients. Driving one gradient with the result of another gradient node and adding animation on top allows you to create sophisticated effects.
Curve nodes allow you to create much more interesting effects and there are more use cases - I intend to show more in another post.
Have fun creating your own fancy patterns and playing around with them!

Always inspiring, and thanks for the mention in your GDC post. Keep posting :)
ReplyDelete